Difference between revisions of "NavBar - Clients"
| (2 intermediate revisions by the same user not shown) | |||
| Line 202: | Line 202: | ||
</div> | </div> | ||
| + | <div class="mw-parser-output"> | ||
= Importing & Exporting = | = Importing & Exporting = | ||
| + | You are allowed to Import and Export your Clients. It is a very simple process and be done by clicking on the import-export drop-down arrow and selecting either option. What an export is done of your Client List you will notice a client ID on the left hand side if this ID is deleted there will be an error when re-uploading. '''Please do not delete the ID. '''ID's are used to reference that claims information no client will ever be deleted they will only be archived. If any information is changed in the row where the ID is located and The Client List is imported the system will use the ID to reference the changes that need to be made. | ||
| + | |||
| + | [[File:Importexportclients.png]] | ||
| + | |||
| + | [[File:Import clients.png|border]] | ||
| + | |||
| + | | ||
| + | |||
| + | | ||
| + | </div> | ||
| + | |||
| + | <div class="mw-parser-output"> | ||
= QuickBooks Data = | = QuickBooks Data = | ||
| − | + | At the bottom of the client data / client information page there's an option for Quickbooks data with a drop-down Arrow. Does Quickbooks data will allow you to see the ID the display name and the last time this client was sync to QuickBooks. If you're having a discrepancy with the clients name and it properly syncing you must match the display name in QuickBooks to ThermoGrid you are able to edit or delete this information. | |
| + | |||
| + | Typically when QuickBooks manages a client you will see the User as "Smith, John" even though the client name is "John Smith" | ||
| + | |||
| + | This is where you able to review the data to see if it matches if you input your clients manually. | ||
| + | |||
| + | | ||
| + | |||
| + | If ThermoGrid creates a client it will automatically be assigned a Number after the name | ||
| + | |||
| + | Example: "John Smith #321374" | ||
| + | |||
| + | [[File:QuickBooks Data.png]] | ||
</div> | </div> | ||
| + | |||
| + | |||
| + | | ||
Latest revision as of 12:52, 22 September 2021
Contents
User Interface
After Clicking on the Clients at the top of the page you will be directed to a page similar to the one below.
This Page will allow you to
- Create
- Export/Import
- View Archived
- Search by multiple options
- Sort Data By those same options
Client Management
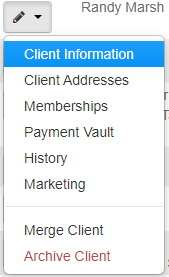
To Manage a Client use the Pencil/Edit button on the Left hand side of the Client, this will open a dropdown menu for quick and simple navigation.
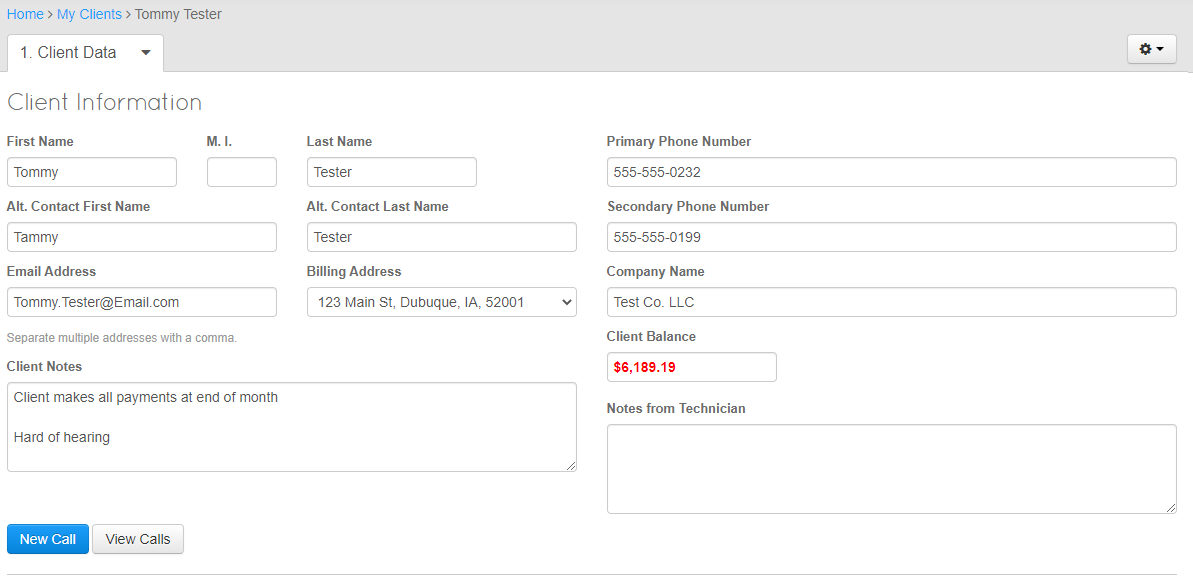
Client Information
The Client information page manages the following:
- First Name
- Middle Initial
- Last Name
- Alternate Contact First Name
- Alternate Contact Last Name
- Email Address
- Chosen Billing Address
- Primary Phone Number
- Secondary Phone Number
- Company Name
- Client Balance
- Client Notes
- Notes from Technician
This page will also give you the ability to create a Call for the Client.
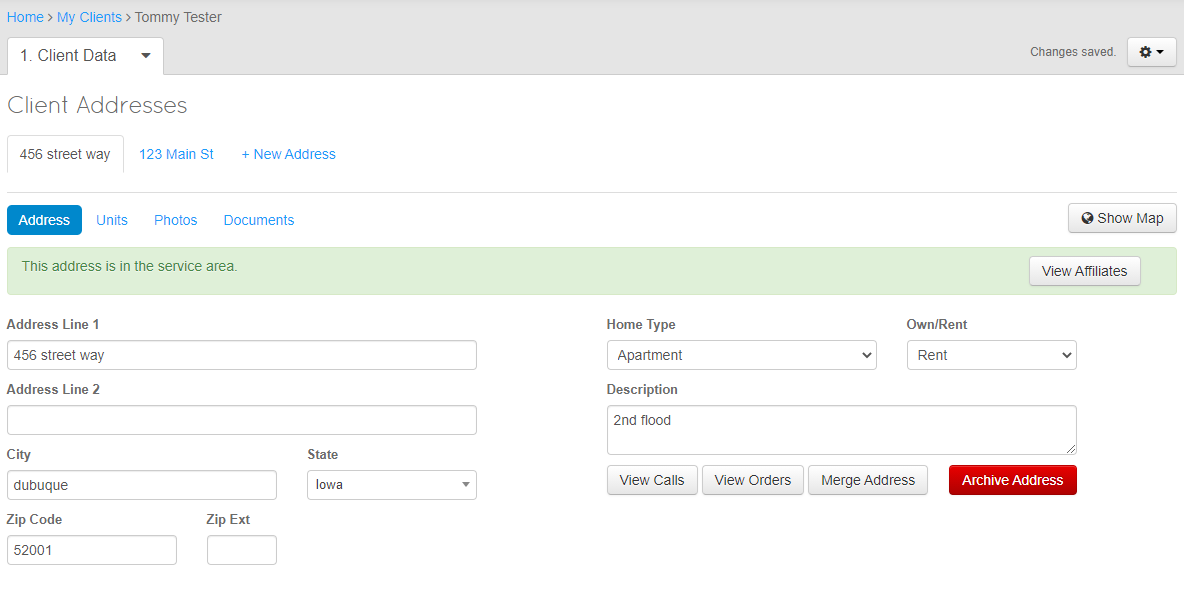
Client Addresses
This Page will allow you to create New Addresses for you Clients and Manage current Addresses.
You can Manage the Following:
- Address Line 1
- Address Line 2
- City
- State
- Zip Code
- Zip Extension
- Home Type
- Own/Rent
- Description
Address
All Addresses are Managed as a Parent / Child relationship in ThermoGrid, This means that the Client is the Primary object and the Addresses are attached to the Client as secondary Objects. This allows us to easily move the Address to a new client if the Home / Location is Purchased or under new Management.
Addresses are listed in tabs above the information and give you the option to add a "+ New Address"
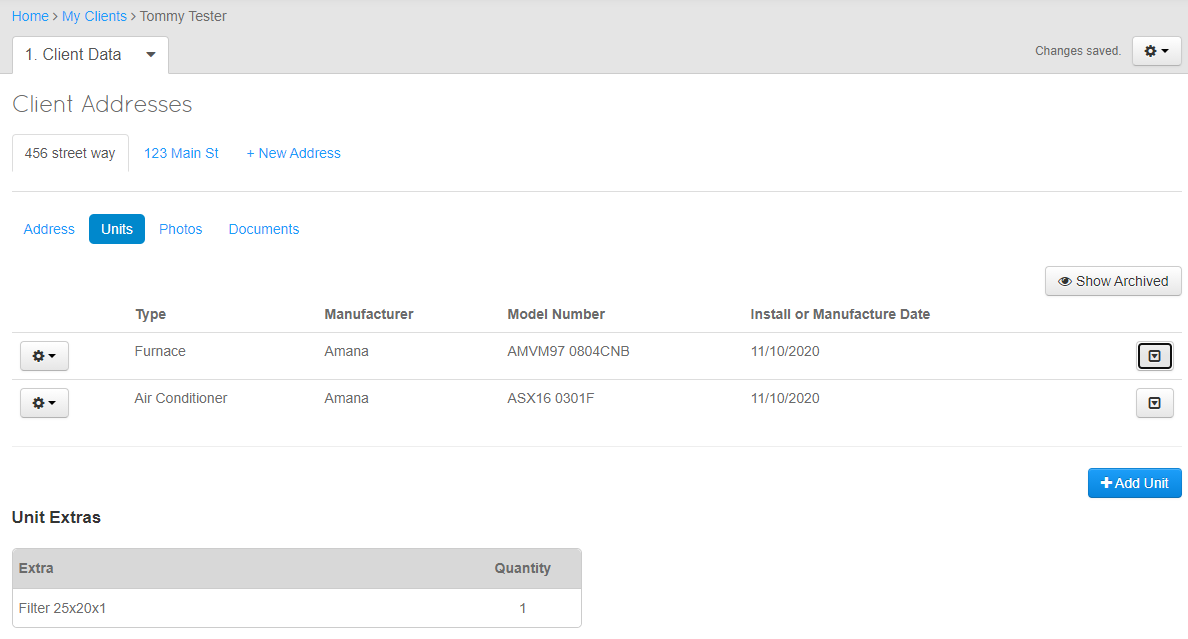
Units
The Units are the Primary Equipment, Piping, Electrical, Lighting or Any Items that you are looking to track that you work on at locations for your business.
This Page allows you to Edit and Create more units for your clients.
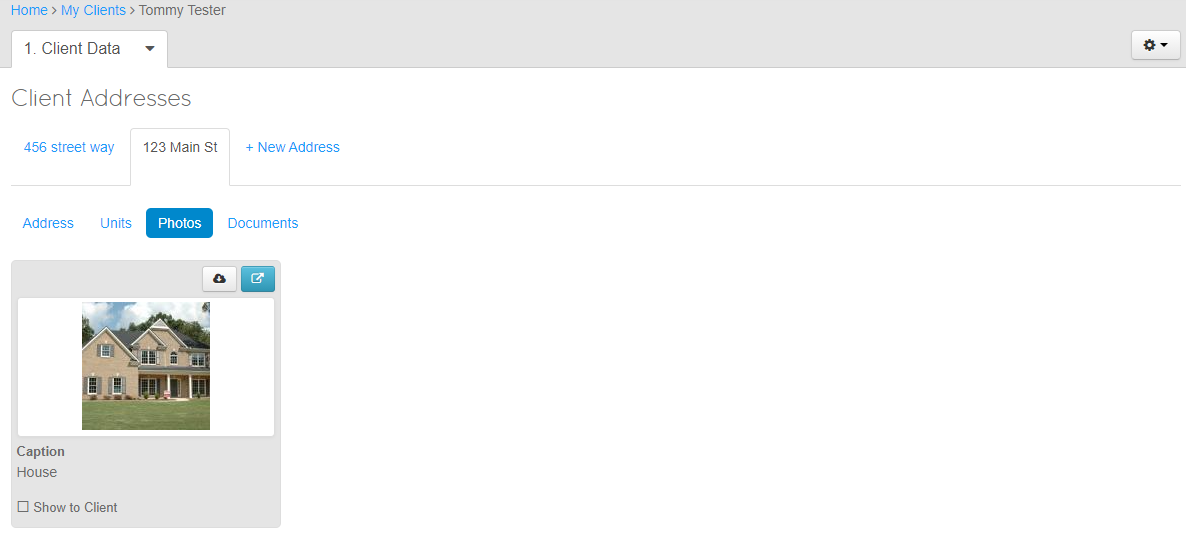
Photos
Photos Are Only pulled from the Site Photos that the Field staff has gone out and taken on a Job in an Order.
All photos from "Site Photos" on all orders will show up in this location
Documents
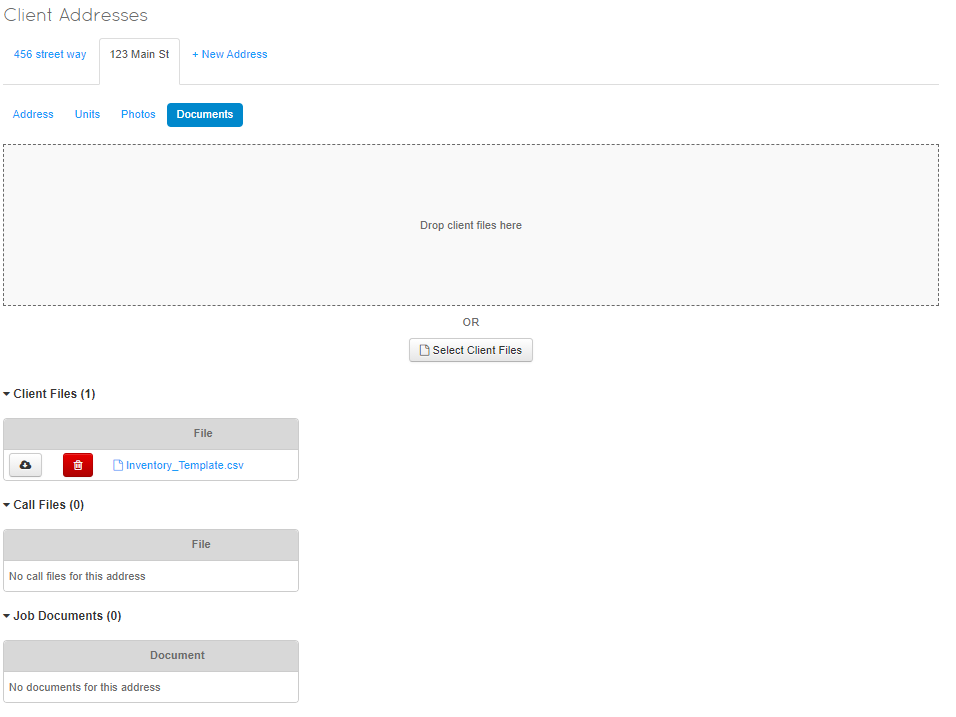
The document page consist of any documents that are uploaded directly to client files, call files or the Job Documents on a order.
to add documents directly to the Address Chose "Select Client Files" and you will be able to upload a document from your computer, phone or tablet.
Call Files will all come from Calls that have been created for the Client.
Job Documents will contain any Job Documents created on any Orders for this location.
Memberships
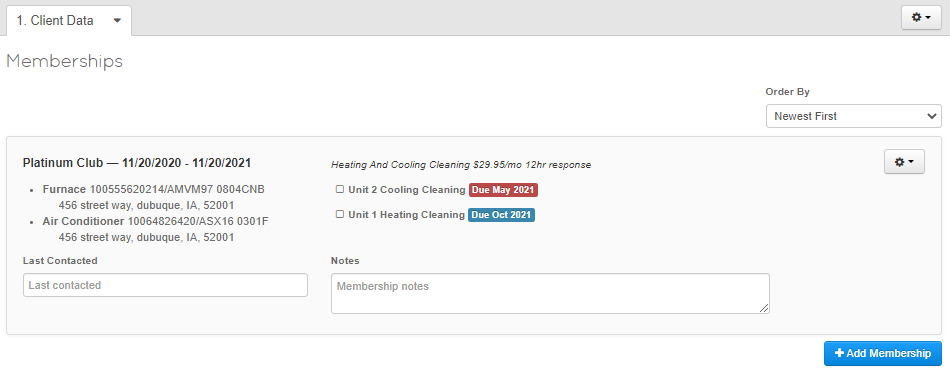
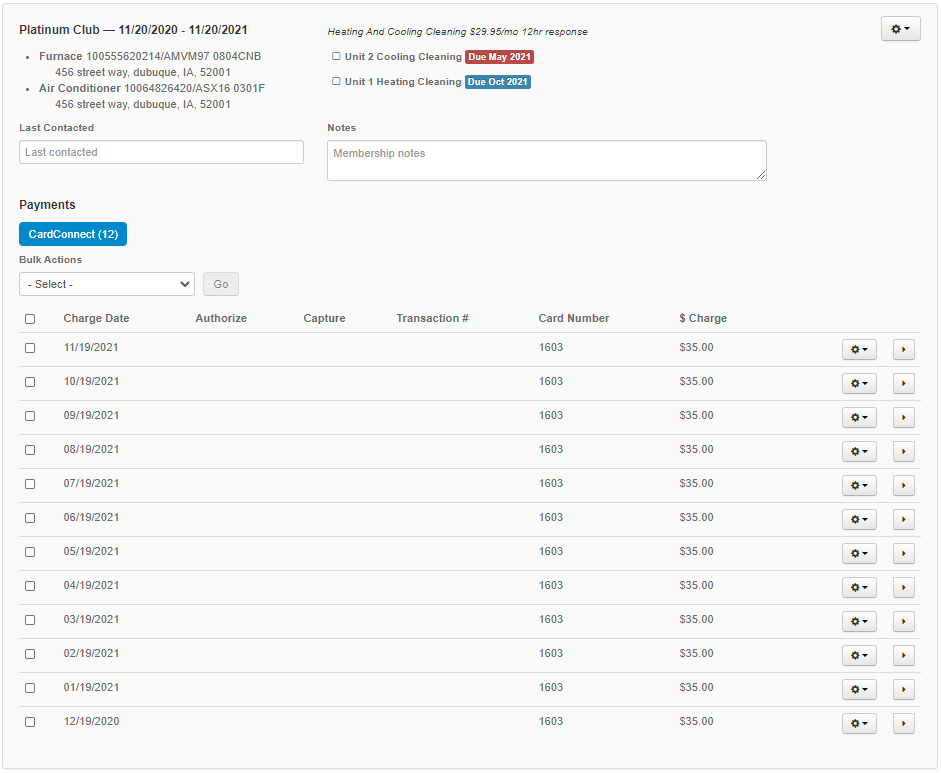
The Clients Memberships can be Added, Edited or Canceled from this page. This will list all memberships of the Client and will show the units they are attached to. A membership can be attached to multiple addresses if units are located at those addresses.
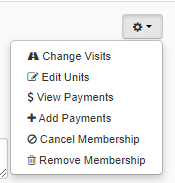
This will list the Units its connected to as well as any due dates for the units. The Settings/Cog/Gear button on the Top right of the membership will allow you to:
- Change Visits
- Edit Units
- View Payments
- Add Payments
- Cancel Membership
- Remove Membership
Edit Button:
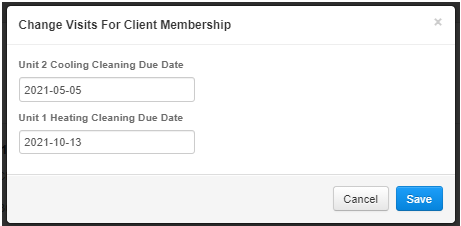
- Change Visits. Use the date fields to edit the visit dates.
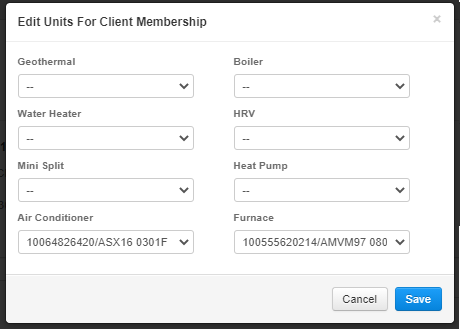
- Edit Units. Here you can select the Units that will be attached from the clients addresses
- View/Hide Payment. This will show any payments that have be scheduled for the Membership. you can edit ,delete and review the payments as well.
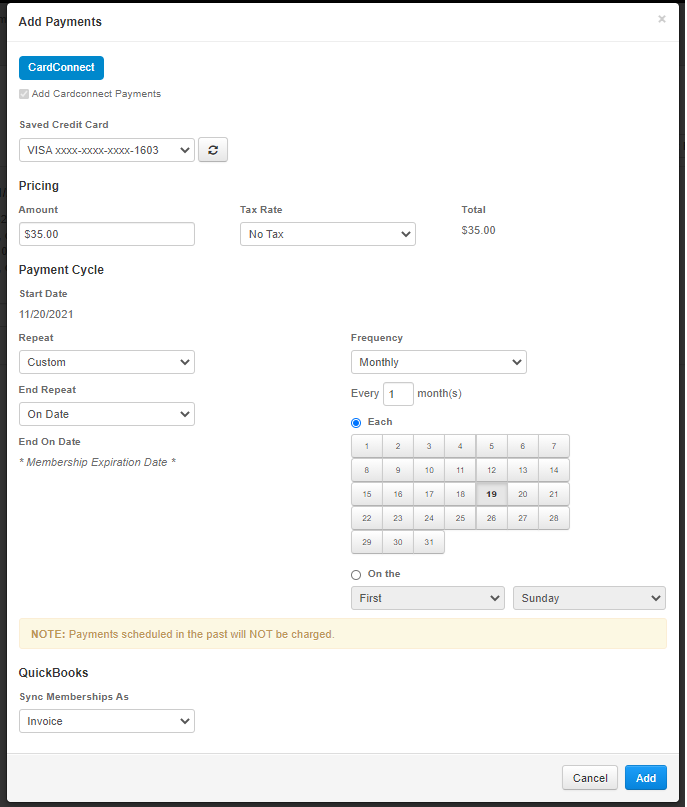
- Add Payments. This Feature will allow you to schedule payments in any way you would like, Month, Day, Year, Dates or Days of the Week.
Us the Dropdown Menus to navigate the the Repeat, End, Frequency or Tax Rate options. you can also edit the Amount and chose how you want to sync to QuickBooks.
Payment Vault
The payment Vault is where Credit Card or ACH credentials are securely referenced. ThermoGrid uses Tokenization for all transations, simply, this means the CC or ACH information is never actually stored on ThermoGrid or your device.
To learn more about Tokenization Click Here: https://en.wikipedia.org/wiki/Tokenization_(data_security)
You can add or Delete from this page
History
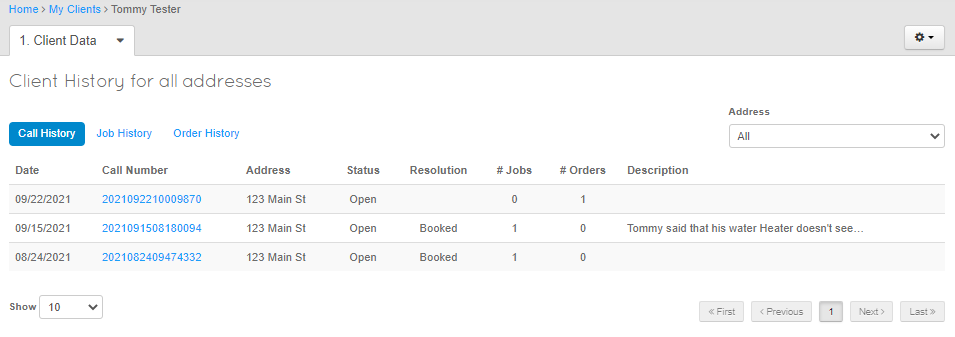
The history page will show call history, job history, and order history.
Call History:
Call history will show date of the call the number of the call, the address of the call, status, resolution, number of jobs, number of orders, and a brief description. To access to call Simply click upon the call number.
Job History:
Job history will show scheduled date, job number, reason, assign technician, status, category, and Department. To access to Job Simply click upon the Job number.
Order History
Order history will include created date, order number, assigned to, selling price, order status, and payment status. You are also able to refine by addresses in the top right corner. To access the order simply click on the order number.
Marketing
If you would like to view which marketing list your client is a part of you can manage it from this page you can either add them to a marking list unsubscribe them from a specific marketing list or if the client requests it unsubscribe from all marketing lists.
Merging Clients
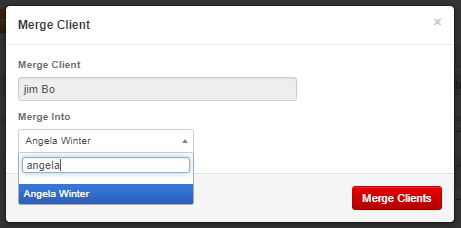
If you would like to merge a client Always Merge Data into the Primary Client. the primary client is a client that you want to keep the name and information of, typically if a duplicate client is created it's best to always merge the duplicate into the original Client Data. Always remember if you merge a client into another client you will not be able to "un-merge"
After selecting merge client a dialog box will come up and it will allow you to search for the client you would like to merge into. Once you have selected your client, click merge clients in red.
Archiving
You can archive a client by using the drop-down menu on the left hand side of the claims page or you can also use the archive client option on the drop-down gear / Cog in the top right corner of the Client Data Page.
Importing & Exporting
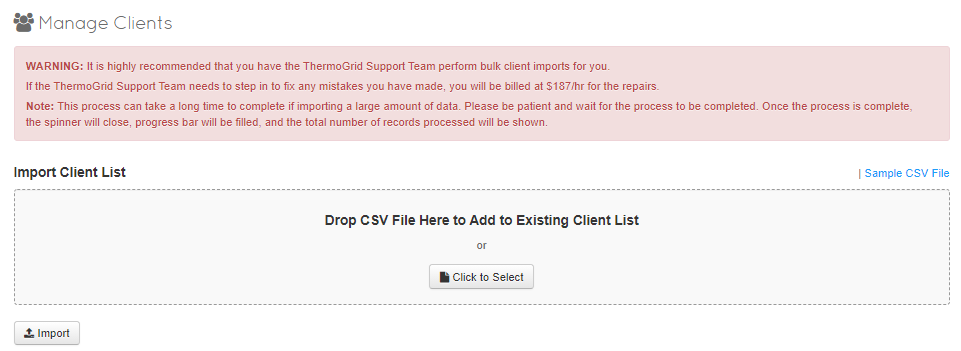
You are allowed to Import and Export your Clients. It is a very simple process and be done by clicking on the import-export drop-down arrow and selecting either option. What an export is done of your Client List you will notice a client ID on the left hand side if this ID is deleted there will be an error when re-uploading. Please do not delete the ID. ID's are used to reference that claims information no client will ever be deleted they will only be archived. If any information is changed in the row where the ID is located and The Client List is imported the system will use the ID to reference the changes that need to be made.
QuickBooks Data
At the bottom of the client data / client information page there's an option for Quickbooks data with a drop-down Arrow. Does Quickbooks data will allow you to see the ID the display name and the last time this client was sync to QuickBooks. If you're having a discrepancy with the clients name and it properly syncing you must match the display name in QuickBooks to ThermoGrid you are able to edit or delete this information.
Typically when QuickBooks manages a client you will see the User as "Smith, John" even though the client name is "John Smith"
This is where you able to review the data to see if it matches if you input your clients manually.
If ThermoGrid creates a client it will automatically be assigned a Number after the name
Example: "John Smith #321374"

