NavBar - Orders
Creating Orders
How to Create an Estimate for a Client
Order # Nomenclature
EXAMPLE: Order # 2018033013180676
Year = First 4 Digits
Month = Digits 5 & 6
Day = Digits 7 & 8
Hour = Digits 9 & 10
Minute = Digits 11 & 12
Second = Digits 13 & 14
Milliseconds = Digits 15 & 16
Filters/Search
Searchable Data must be entered the appropriate cell.
Example: If I am searching for the Client "Sasha Johnson" I must enter it in the "Client" Filter Option, If it is entered in the "Order #" Filter you will not receive the results you were looking for.
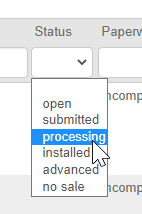
Status Filter
Open = This is the status when an order is created and should only remain open till the Sales quote is given or the service job is complete.
Submitted = Every service job is to be submitted when the job is complete... Even if it is a no charge or call back. Only orders that are sold are to be submitted.
Processing = Option to sort orders based on current internal procedure
Installed = If you are doing VERY detailed management you are able to also change the status of an order to Installed, This is not necessary and is only used for sorting your data.
Advanced = This is a status used on sales when when a price was not able to be given upfront and the appointment had to be rescheduled with the client to finish up. This can be used on service jobs that are holding for parts or incomplete.
No Sale = This would be given to sales orders that were quoted that a client did not move forward that day. Make it a no sale and you can always open back up.
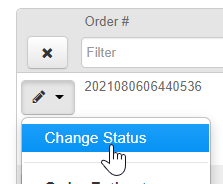
Change Status
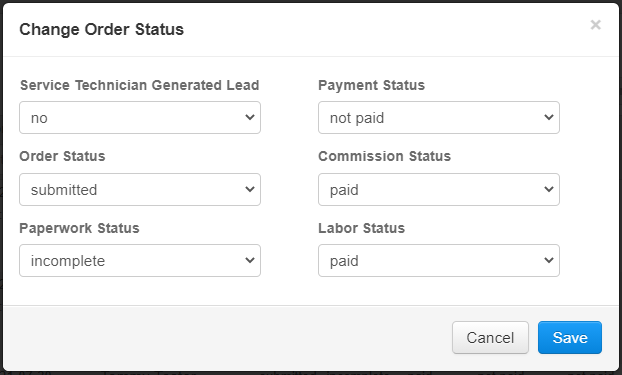
If you would like to change any status of the Order from this Page the Edit Button on the Left hand side of the Page and Chose the "Change Status option"
From there you have 6 Options to Change
Delete Order
Must have the role Reopen Calls in Manage User Accounts to delete orders.
To delete an order from this Page:
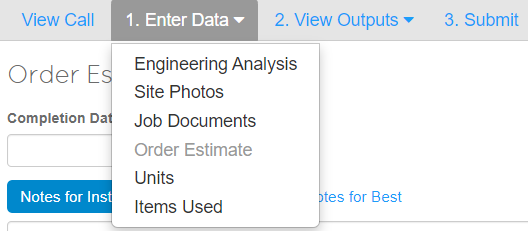
1. Enter Data
- Engineering Analysis
- Site Photos
- Job Documents
- Order Estimate
- Units
- Items Used
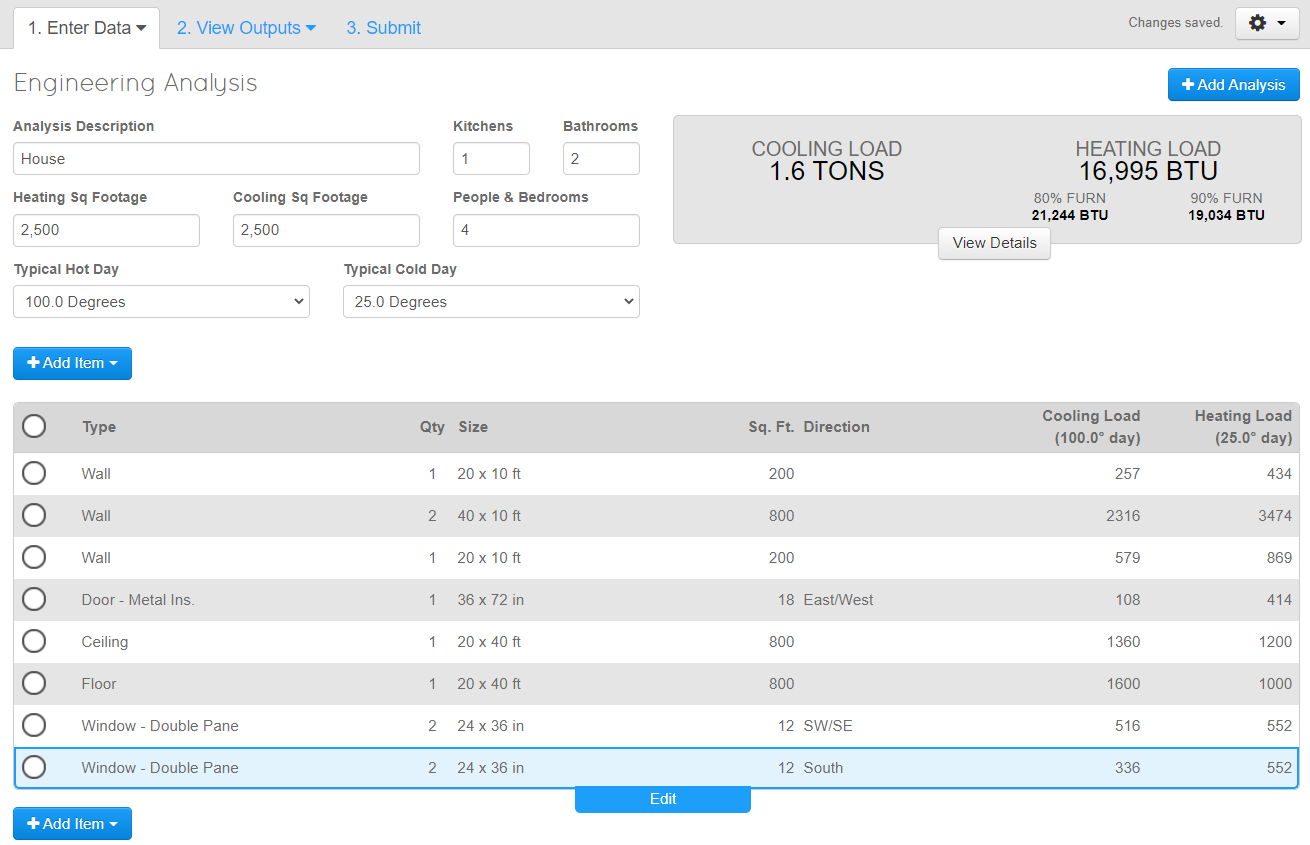
Engineering Analysis / Load Calculation
This allows you to complete a load calculation quickly, easily, and accurately.
There are many ways to complete a load calculation.
- The Whole Home
- Each Level
- Room By Room
See the Videos of the Engineering Analysis
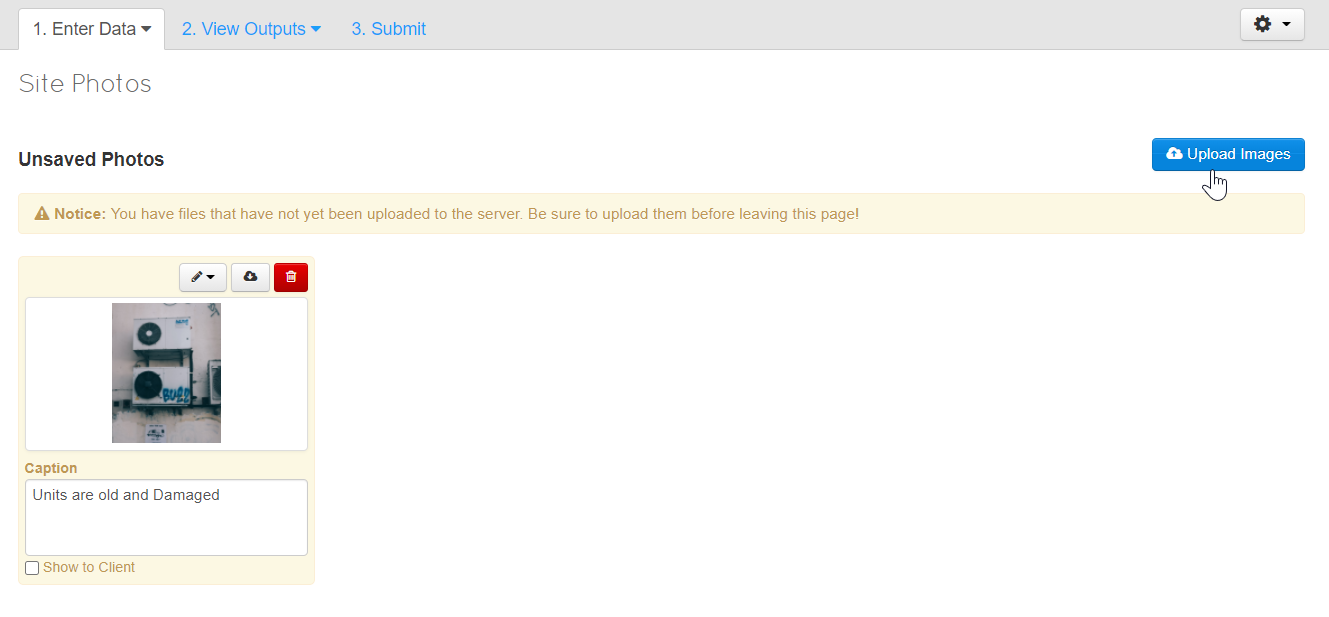
Site Photos
Here you can take a picture from you tablet or cell phone or upload from your library.
You can also add a caption to each picture.
By clicking hide it will put a check mark and change the name to display. This will attach the picture and the caption to the Client Agreement allowing you to show before and after pics or make recommendations.
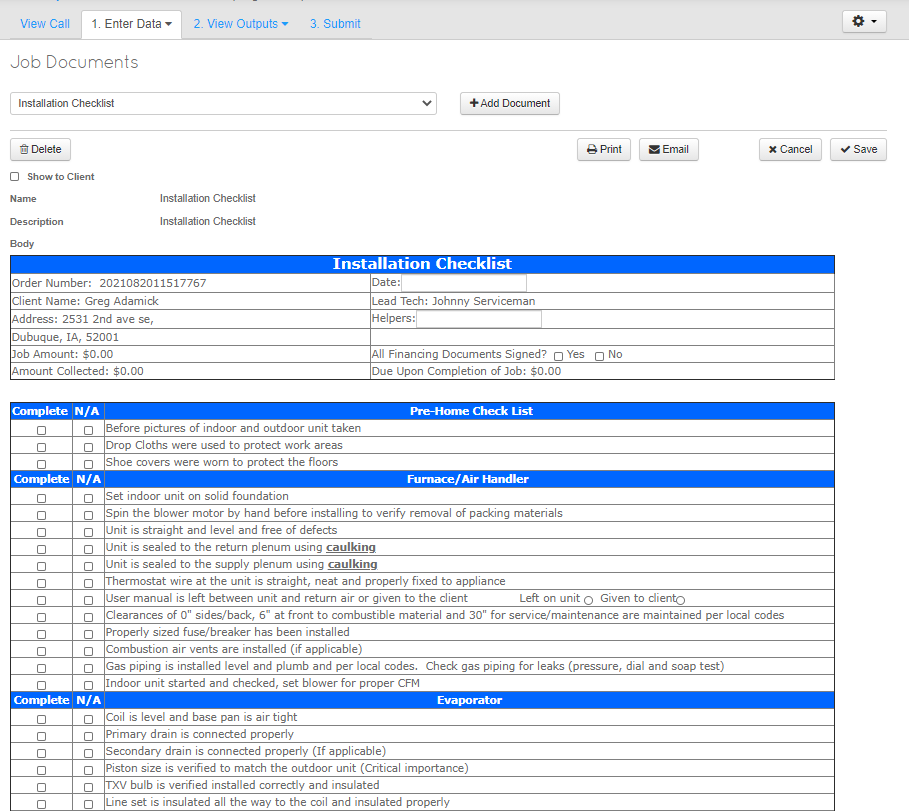
Job Documents
Job Documents are Forums or Documents that can be customized to present certain Information to a Client or be stored for internal use.
There are some pre-populated documents when the account is created but these can be Changed and Edited or Deleted.
Click the dropdown triangle, select the document you want, and click +Add Document.
Fill the document out and click save when done or before moving to a new screen.
You can print or email from here or you can click show client and it will send this document in the same email as the Client Agreement.
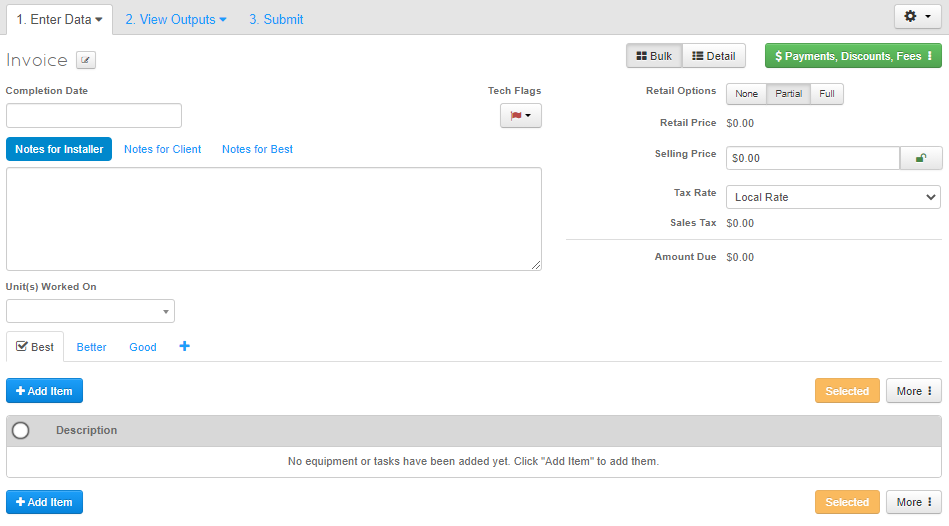
Order Estimate
This section will cover all details about the order estimate.
Notes
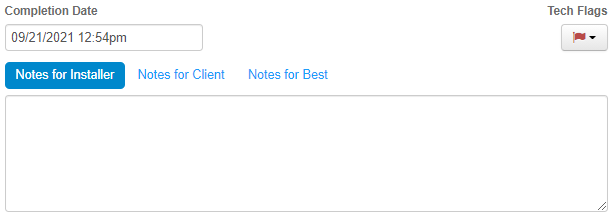
Completion Date = This is for the date you did the work. If you use QuickBooks this will be the date the invoice hits your income statement.
Installer Notes = This will transfer to the Install Task Sheet, the client will not see these.
Notes for Client = The notes here, will go to every Estimate option and the Client Agreement no matter which option they choose.
Notes for (Good Better, Best) Options = If a Note is entered in the "Notes for _______" Option they will directly correlate with any of the created option on the order estimate when presenting a comparison or when the option is selected it will display the notes on the Client agreement .
Tech Flags 
Call on the way = This will transfer to the Installer Task Sheet letting them know what to do or to prepare them.
Pets = This will transfer to the Installer Task Sheet letting them know what to do or to prepare them.
Sign Paperwork = This will transfer to the Installer Task Sheet letting them know what to do or to prepare them.
Technician Collects Payment = This will transfer to the Installer Task Sheet letting them know what to do or to prepare them.
Units Worked on
If this is a service job you can choose the model number that is being worked on. When you select a unit, the Cost of the repair will be applied to the Unit. A report of total repair Cost on the Units can be ran to get the client to look into replacement. Unit Cost
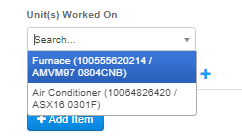
 To Select a Unit Simply Click/Tap the Dropdown Menu to choose from the List of Options. (If there are no Options, Go to "Enter Data > Units" and Enter the Unit information.
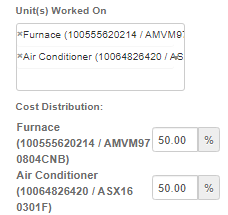 When the units are selected they will create an equal cost distribution between the total number of units. If you wish to edit this feel free to change the value on either unit. If the total is above 100% you will receive a warning.
NOTE: If You do not see any Units in the Dropdown Go to "Enter Data > Units" to Input the information for the unit you are servicing.
Adding Items to an Order (Estimate / Invoice)
+ Add Item = This is what you click to add items from your price book to Estimates / Proposals or Agreements / Invoices.
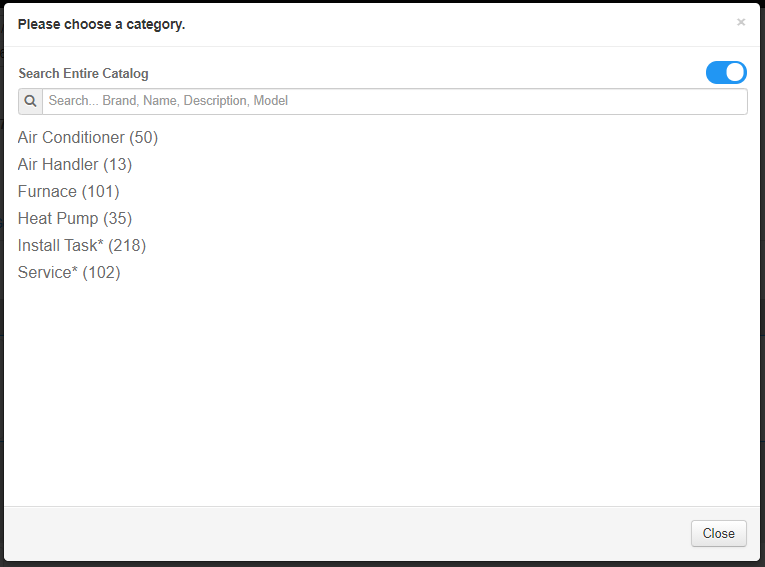
After Clicking Add Item you will be presented with your Service Catalog. If you use the search function from here you're able to search through brand name description and model number of your entire catalog without clicking on any of the options below the search bar. If you do click on the category below the search bar you would then be searching within those category options or filters.
When you are on a filter or other option that will be two buttons in the bottom left corner to either go to the previous screen or reset from the very beginning.
The first option that is created will automatically be selected but if you need to select a different option the select option button is in bright orange on any other tab.
![]() Select Option = This is how you choose the option you want to transfer to the client agreement.
Select Option = This is how you choose the option you want to transfer to the client agreement.
Editing Items on the Order:
To edit a line item on the Order Simply click on the Line Item and it will Highlight in Blue with a Button that says Edit.
Once you have clicked, there will be an option to edit Selling Price, Quantity and Tax Type (these settings may be restricted)
Separate tax from Item Cost = Means if the the retail amount is $500 for the repairs it will be $500 plus tax.
Include Tax in Item Cost = Means you pay tax when you buy the equipment but you do not change tax on the clients invoice... you just pass it through.
Don't Apply Sales Tax = No tax anywhere, you didn't pay any tax and client does not need to pay tax on anything.
More Button
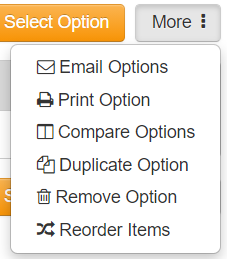
Email Option = Allows you to email the client this option
Print Option = Allows you to print the visible option.
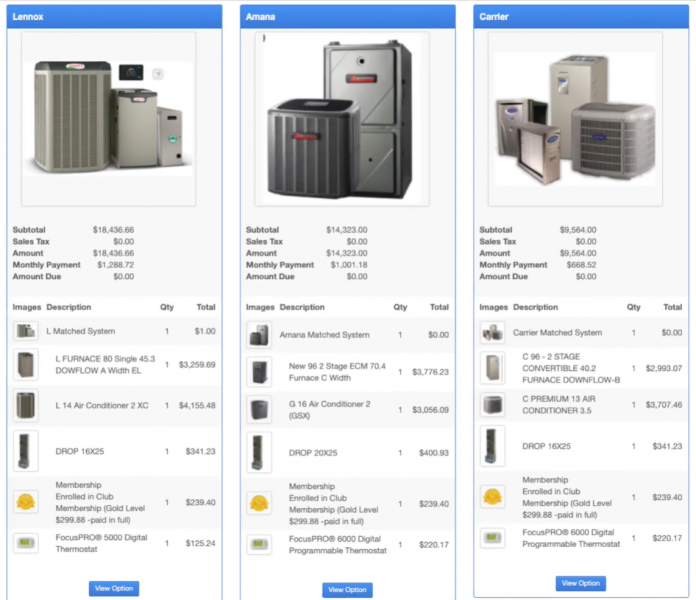
Compare Options = Allows you to perform a Side-by-Side comparison with up to three options on your Order Estimate.
Duplicate Option = This is best to use when you have built out an option for the client but you would like to remove some items from the next option. In a "good, better, best" scenario; best practice would be to create the most expensive / extensive option first. Then duplicate this option and remove off the next items that may not be necessary for the service, repair or install.
Remove Option = This allows you to delete the option that you are clicked on.
Reorder Items = This allows you Change the positions of Items listed on the Order Estimate.
Payments that will be made Today
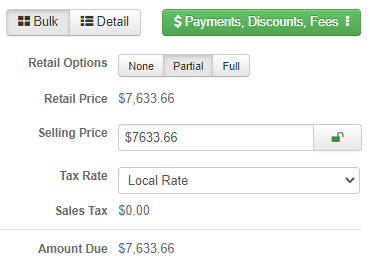
Bulk/Detail = Options to either show all Line Item's prices on the Order when presenting a Quote/Estimate or Hide Individual Item Cost and only show a total.
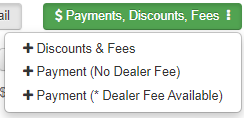
Payments, Discounts, Fees = This will allow staff to pick a prebuilt discount or fee and add a payment history to the Order.
NOTE: The discount or fee must be the last thing done on this page. If you add in a discount and fee then change items on the option you must delete the sales price and the discounts and fees. Discounts & Fees
Payment (No Dealer Fee) = This payment Type will NOT Account for any Fees you have associated with Credit Cards / Debit or any sort of Financing. NO processing Cost from the payment type will be passed on to the Client.
Payment (* Dealer Fee Available) = This payment Type WILL Account for any Fees you have associated with Credit Cards / Debit or any sort of Financing. Your processing cost WILL be passed on to the Client.
Retail Options:
- None = You are not accounting for Dealer Fees and NEVER expecting a Payment for this Order.
- Partial = Part of the job will be using a payment method (usually something with a dealer fee), the amount going on the payment method needs to be typed into the "Amount" area, you can also add another down payment under down payment usually check or cash.
- Full = This means all of the money is collected by financing, credit card, etc. The client agreement will show paid in full.
Retail Price = This is the amount you should charge the client based on how you have your Price Book, Commission, Dealer Fees and Gross Profit Margin.
Selling Price = You can choose any amount to type in here or use what is pre-populated. If you override the price it will make a discount or fee automatically. (adjusting this could effect commission, bonus scale and Gross Profit)
Tax Rate = Here you can override the tax rate to charge on this job. To add more/edit go to Tax Settings
Sales Tax = If an item is listed as separate it will cause this area to show total tax. If an order has a discount it is going to be listed as taxable. It is recommended to not have different tax methods on one order. Tax Settings
Payment Method = You can choose any payment method and it will be reportable. Also if the payment method has a dealer fee you can choose to have it adjust your gross margins to cover the cost. Payment Methods
Monthly Payment = This is calculated by the payment factor area in Payment Methods
Amount Due = This is how much will be due on the Order Estimate / Invoice.
Units
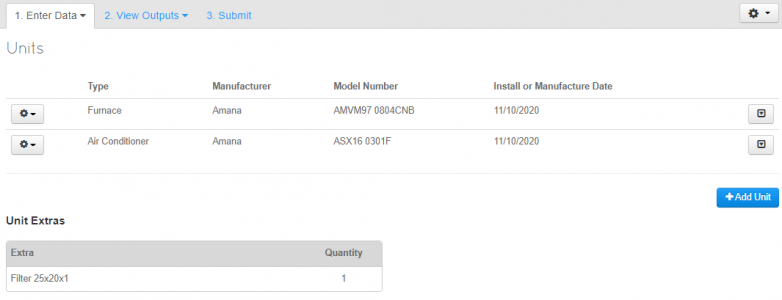
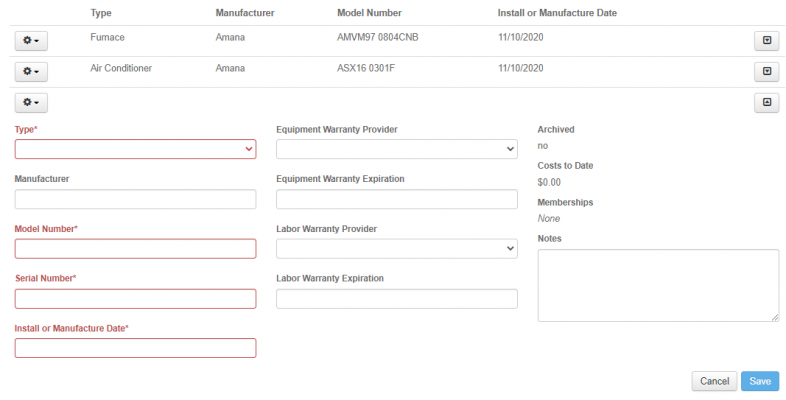
Here is where we add equipment we want to track from a homeowner. Even if you didn't install the system you still add it in. The date must be put in to closest year month day does not matter on equipment you did not install.
Click "+ Add Unit" and you will be presented with a Menu to input all unit information including:
- Type (required)
- Manufacturer
- Model Number (required)
- Serial Number (required)
- Install or Manufacture Date (required)
- <label>Equipment Warranty Provider</label>
- <label>Equipment Warranty Expiration</label>
- <label>Labor Warranty Provider</label>
- <label>Labor Warranty Expiration</label>
- Notes
Once this item is entered you can now add pictures to the unit (picture of the system, extra items filters)
Click Save to Save all Unit Information
You can now select the Unit on the Order Estimate
Items Used
This is how you can track inventory for jobs like installs or items that are not sold on an invoice.
Add Purchased Item
This is to track items bought from stores like Menard or Home Depot
Add In Stock Item
These are inventory items that are currently on a truck.
Add Out of Stock Item
These are normal inventory items or items in the price book that truck is not currently stocking.
If you want to create a PO for an item check the box on the right of the item and Create Inventory Order. This will tie the order number to the PO.
2. View Outputs
This page will display:
Client Agreement | Commission | Job Costing | Supplier Orders | Install Task Sheet | Order Estimate
Client Agreement
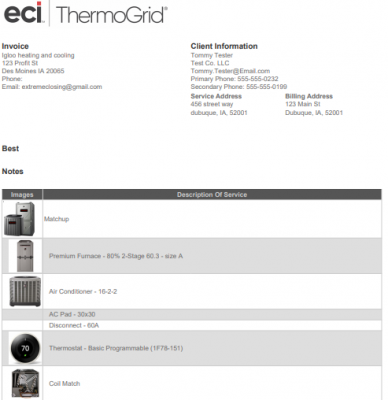
This will allow you to give an invoice to a client have them sign on the spot or email it and they can click view agreement, sign agreement, and sign and save. when they do this it will email you letting you know they signed and auto add their signature in the system.
You can show one price for all items.. it defaults as Bulk price.
You can show price for all items individually by clicking Detail.
You can change what the Client Agreement is called by clicking the edit button by Client Agreement.
Commission
Job Costing
Job costing is defined as a method of recording the costs of a job. With job costing systems, a project manager or accountant can keep track of the cost of each job, maintaining data which is often more relevant to the operations of the business.
Find your true Gross Margin with Job Costing
Things you'll need to know/have.
- Payment method - (Check Payment Method on the order estimate page to insure it is correct)
- All invoices (suppliers, sub contractors, etc.) (verify all items and cost is entered)
- Inventory restock lists associated to the job. (Enter all cost)
- All time sheets (Can select this in the Labor section of the job costing)
- From the home page select “My Orders” •
- Change Status filter to Submitted by clicking the drop down
- Change Costing filter to "not done"
- Click the drop down triangle next to the edit button (pencil)
- Select Job Costing
- Review the items (if there are items on the invoices or inventory lists that are not listed on the job costing page, go to order estimate and add the items in.) to go back to the job costing click back on your browser or view out puts then job costing.
- To edit the cost of items click edit and click on the dollar amount of the item. When updating these items (material, equipment) they must be edited in the bottom section Gross Margin.
Editing
Selling or Retail Price
- This needs to be changed on the Order Estimate page. If retail needs to go up add the items needed to increase it.
- If the selling price needs to change, do that in the selling price location.
Commissions
If commissions need to be edited do it in the commissions section of the job costing.
Labor
- Only select a tech for "Technician who performed the labor" if the tech is on "task" pay.
- If a tech is hourly, click on the + Labor select all jobs you want to pull in on this order for wages to complete this order. (this will be actual labor cost of all techs based on their hourly pay from the manage user section)
- Then you can type this amount in as the new "labor amount" under the commissions section of the job costing.
Material, Equipment and Other Cost
- At minimun these numbers need to be change in the Gross Margin section of the job costing.
- If you want to itentify which items where off you must update each line item as well as the Gross Margin section.
Technicians
Sales Technician: (Put in who sold the job, if this a commissionable order)
Technician who generated the lead: (Put in who generated the lead, if this a commissionable order)
Technician who performewd the labor: (Only select the installer here if they are task pay)
Payment Status
If the client paid in full you can mark it as paid, this will not do anything as far as how it transfers to QuickBooks. If you want to transfer payments to QBO click here for QBD click here.
Finish Editing
To do this click finish editing at the top right of the screen
Mark Complete
- When you click mark complete you are able to close the Job and the Call right from here.
- Only close the call if there are no other jobs in it that still need to be completed.
*** Again Please Note:
When Editing prices or commissions, make sure you edit the commissions in the top section labeled "commission" and the bottom section labeled "Gross Margin".
When updating cost you can update the mid section of each item but you must update the section at the bottomed labeled "Gross Margin" either way. There reason for this is to update the payroll pages properly as well as the orders reports.
Supplier Orders
All the equipment and materials you sell for an install must be setup in the Service Catalog with suppliers names in on the item itself to do the automatic ordering for installs. Once this is done you will have PO generated by supplier on the Supplier Orders tab of the veiw outputs on an order.
To do the Inventory Management you must complete the setup of your locations and stock levels.Install Task Sheet
This is automatically generated fromm the Order Estimate page telling the installers what they need to do.
The installer can edit and put notes in and change the percentage of the job that is complete.
You can have the client sign off at the end of the job or you can have the installer sign off that they completed all the work listed.
3. Submit
Every Sales and service job should have an order.
Every service job that is complete should be submitted even if it is a call back and nothing is being charged. You should still put in on the order what you had to do.
Only sale jobs that are sold are submitted. If an estimate is given and the client does not accept the order status should be changed to no sale.
If you need to go back to the clients location and can not complete the job or the estimate change the order status to Advanced.

